Landscape Artistic Stretchies
February 2, 2013

December 13, 2012
art secret 20 - it's ever green, watercolor fir trees
art secret 20-it's ever green, watercolor fir trees
Here is a simple and effective way to create an evergreen tree in snow.

1. Holding your paper vertically, draw a hilly horizon line.
 2. Do a wash in the sky area and add some blues. While it is still wet, lightly sprinkle some salt on it here and there. Let your painting dry. After it's dry brush the salt off and there you have a nice snowy effect.

3. Now we start doing a light underpainting with the side of a round brush using a very light mixture of sap green and prussian blue. Make sure you overlap into the snow.
 4. Using the same color mixture start at the center of the tree and work towards the edges of the tree but-Art Secret-stop a little before the edge so you can still see some of the lighter color underneath! I do go to the very edge
at the bottom of the tree to create a cast shadow on the tree.
 5. Now you will add a darker and final layer from the center out, again keeping in mind that you don't want to go out too far. Make sure you can still see the first and lightest layer of color and the second layer as well. That way you create color perpective and now...

6. ...for the details. I made sure that the center of the tree was the darkest and I created a light source by painting a shadow under the tree. And for the final touch, I loaded up a toothbrush with white paint (tempera will do) and splattered the whole painting with the white paint for a snowy effect. Make sure you have a lot of newspaper under and around your painting or you'll splatter everything. These are great little paintings.Enjoy!!!
Here is a simple and effective way to create an evergreen tree in snow.

1. Holding your paper vertically, draw a hilly horizon line.


3. Now we start doing a light underpainting with the side of a round brush using a very light mixture of sap green and prussian blue. Make sure you overlap into the snow.

at the bottom of the tree to create a cast shadow on the tree.

6. ...for the details. I made sure that the center of the tree was the darkest and I created a light source by painting a shadow under the tree. And for the final touch, I loaded up a toothbrush with white paint (tempera will do) and splattered the whole painting with the white paint for a snowy effect. Make sure you have a lot of newspaper under and around your painting or you'll splatter everything. These are great little paintings.Enjoy!!!
August 7, 2012
art secret 19 - creating the black value: acrylic
Mickey Mouse looks good in black but black is not always the best choice in a painting...so let's create the illusion and mystery of black without actually using it.

I used a combination of colors sometimes just mixing two and sometimes all of them. The first one in the top row is Dioxine Violet and Burnt Umber mixed together and directly underneath is a tint (adding white) of that mixture.

So you'll see that the top row is a mixture of colors and the row directly underneath is that mixture's tint. Try mixing them yourself and add new colors. It is a mystery and one for you to solve, so go create the black value!
June 26, 2012
art secret 18 - maryellen minute #4
geranium joy
Warm up with a quick watercolor wash, flowers and more.
June 6, 2012
Mundane Creativity
I came across a wonderful article on THE MAN'S COACH at HeartCenter Coaching Blog.
Mundane Creativity is a must read!

Susan and I have been friends since 1996 when I first went to her studio for art lessons. This week she’s turned 65 and is younger than ever. She’s constantly recreating herself. Whenever Susan gets feeling low, she either goes out for a brisk run, or, in the winter, goes speed skating on a frozen pond. She makes it a point to get her friends together for a few drinks and long, therapeutic chats. Susan is more than a survivor; she’s a thriver.
Mundane Creativity is a must read!
Susan and I have been friends since 1996 when I first went to her studio for art lessons. This week she’s turned 65 and is younger than ever. She’s constantly recreating herself. Whenever Susan gets feeling low, she either goes out for a brisk run, or, in the winter, goes speed skating on a frozen pond. She makes it a point to get her friends together for a few drinks and long, therapeutic chats. Susan is more than a survivor; she’s a thriver.
The best thing Susan has taught me is to recalibrate my creative energy whenever I feels I’m getting stale. She’s amazing. Lately she’s been making one-minute videos to put in her art class newsletter and on YouTube. These videos are brief art instructions, pithy “quickies” that extend her influence to reach out and encourage budding artists to pick up a brush or a pencil and just start expressing themselves.
Don't Stop Now........Continue reading at HeartCenter Coaching!
Don't Stop Now........Continue reading at HeartCenter Coaching!
June 1, 2012
May 1, 2012
March 24, 2012
February 10, 2012
art secret 14 - inspiring creativity using watercolor or acrylic
....and Helen Frankenthaler

Suffering from painter's block?? Out of ideas? Time to loosen up and and be freeeeeeee!
1. Get a piece of watercolor paper 12x18" or larger, some watercolors or acrylics, water, brushes and a spray bottle. Then.......
2. Without thinking about it, start painting random shapes using random colors and the only rule is....there are no rules, right or wrong.
3. You can overlap shapes and have them go off the paper, use your whole body as you move the brush, stand up if you want.
3. Turn the paper upside down and continue painting. Turn it on its side and paint some more. Keep painting because Helen Frankenthaler said:
"For me, as a picture develops, color always comes out of drawing. I start out as a spacemaker on a flat thing with four corners. But color is the first message on the picture plane."

"Color is extremely important to my process. It's born out of idea, mood, luck, imagination, risk, into what might even be ugly: then I let it tell me what might/should be next, until I get the light and order that satisfies to perfection. The result is color and space and, I hope, a beautiful message."
Helen Frankenthaler 1928- 2011
Here are some spontaneous studies that my students are working on:


As you can see, everyone has a different way of expressing their creativity.
Give it a try and have some fun!
January 2, 2012
art secret 13 - how to draw an ellipse
Ever have trouble drawing a proper ellipse in a still life?
Here's a good way to get those ellipses even...
1. Draw the entire structure of each object in the still life, even objects hidden behind others.
An ellipse is horizontal at its top and bottom points and vertical at its left and right points.

2. Start by blocking in the basic height and width of the object.
3. Roughly sketch the shape of your ellipse at the top.

4. Measure to create a symmetrical diamond shape.
5. Adjust your ellipse around the diamond so your ellipse is even
(according to the symmetrical *diamond shape).
*Note: if you have squashed a square, you'd get an even diamond shape.
6. Repeat for the the bottom and your ellipses will be equal.

7. Erase your guidelines, start shaping your object and voila!!!

inspired by Sadie Valeri
November 30, 2011
art secret 12 - watercolor winter snow scene
watercolor winter snow scene
with no white paint used
First sketch out a scene on regular drawing paper, then, using tracing paper, trace it with black marker. Place your marker drawing on a light box or window and trace it onto your good watercolor paper. This allows you to not only use your drawing again but..(art secret!!!) it ensures that your watercolor paper doesn't get scarred from repeated erasing.

Ready to trace onto good watercolor paper.
Next make a color menu (art secret #9 and #10). I used new gamboge, rose dore, prussian blue, payne's gray, burnt umber, burnt sienna, viridian green(winsor green), sepia and a dash of alizarine crimson for my color menu. Do your underpainting (art secret#11 ) and sky area.

Underpainting and sky.
When your underpainting is dry, start layering up your color leaving the white paper as the snow.

layering in color
Try to get most of the tree trunks and branches done before you start adding your pine needles. Next I added some grasses and twigs sticking out of the snow as well as some other details.

Adding twigs and other details.
And now for art secret #12...

Using a sharp exacto knife gently scrape away paint to create snow and white in the water the same way. Pick off the paint to create snowy and icy areas on the trees and water. and Voila! Snow details finish off this peaceful, beautiful winter scene.
October 29, 2011
art secret 11 - secret of painting or drawing pumpkins
There is a simple SECRET for doing a drawing or painting of a pumpkin!
Hint: Check out the way the pumpkin has lots of lumps and bumps.

First, sketch out the pumpkin being careful to include all of the vertical lines and make sure you sketch the part behind the stem as well.

If you are doing your pumpkin in color practice using yellow as your
under painting and build up
your layers with orange, alizarine crimson,sap green and burnt sienna to
create your lights and darks.

For your final painting be sure to create a caste shadow under your pumpkin with the complementary colors mixed with a dash of orange. Notice how the core shadow has a lot of orange showing. Enjoy!
September 24, 2011
art secret 10 - make a color menu part 2
Find the Transparent and opaque colors!
Art Secret Question: What one color is always very transparent in all media? Hint: It's not yellow. See below for the answer. You'll be stunned.

Another way to check out your color menu is to test the opacity and transparency of the colors that you are going to use. Here Laura is using permanent black India Ink to make tests strips. You can test the colors of any art media this way.

Let's talk about why it's important to know the qualities of the medium you're using. Right now Laura has let the India Ink dry on the watercolor paper overnight and will be using watercolor to test her colors. As artists we need to know if one color will overwhelm another color or even obliterate it.

Using the primary colors of red, yellow and blue as her base, Laura is taking 12 completely different colors with 12 different qualities. Check out the names of the colors and see how they look over the India Ink.


Using these same colors, Laura has let them blend together to see the effects she can expect while painting with them. Way to go, Laura!
You all should give this a try, it gives you a lot of information before you even start. And save your menus so you can continue to use them.
Art Secret Answer: Alizarine Crimson is always a very transparent pigment. Test it out and see.
September 6, 2011
art secret 9 - make a color menu
Color Menu For Your Painting!

Why practice on your final painting? The easiest thing to do that gives you the most control is to work up a menu of the colors that you are going to use in your painting. Look at the shades of yellow and green watercolor in the sample menu above. You can do this with any art medium.

This is a work up of the colors you see in the color menu above. The artist has also added complementary colors into the study. Using a color menu and knowing what colors to use makes your painting shine. Try it and share with us!
June 29, 2011
art secret 8 - stretching watercolor paper
These photos are a wonderful example of how to stretch watercolor paper over a wooden frame or stretcher bars. To do this you will need a piece of 140 lb. watercolor paper, a wooden frame to stretch it over (make sure that the frame is smaller than the paper!), a spay bottle with water and a staple gun and 1,2,3 you have watercolor paper stretched over a frame ready for painting.

1. Take a piece of watercolor paper and dampen one side by spraying it with water. It should be damp not wet.

2. Place the frame on top of the damp paper and start stapling by putting a staple in the center of each stretcher bar. Pull the paper snug as you turn the paper around to staple it. Staple on either side of the center staple all around and then fold the corners as neatly as you can and staple away!
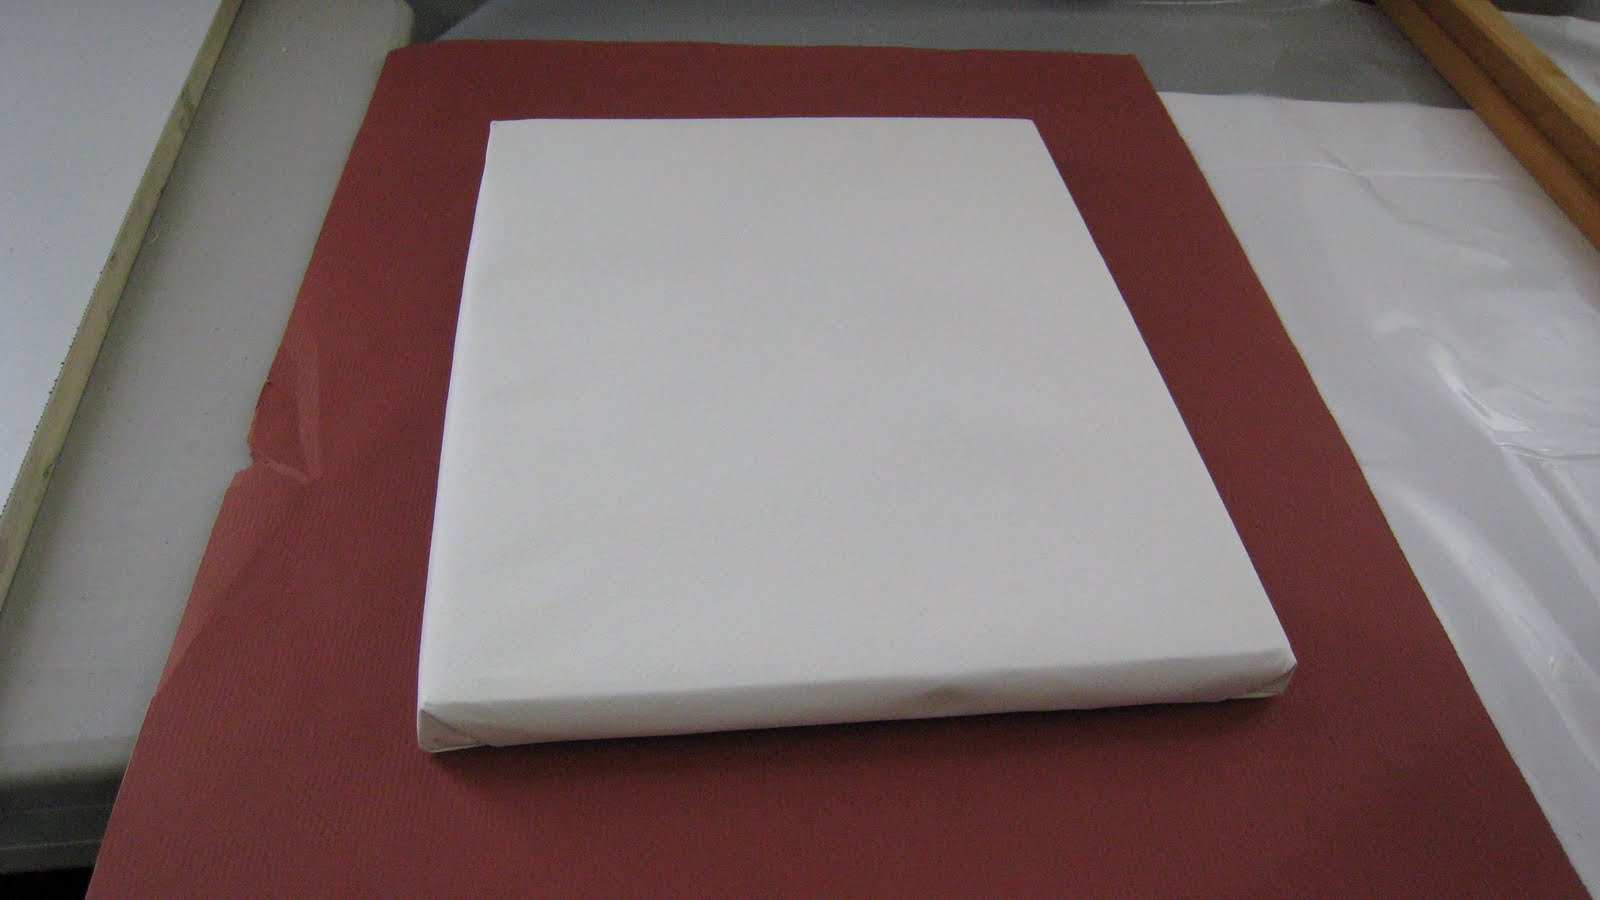
3. Voila! You now have a great surface to paint on. As the watercolor paper dries it will flatten and be tight as a drum when it dries and although it will loosen up each time you paint, it will continue to dry flat.

Here is a painting done by Laura on stretched watercolor paper.
April 29, 2011
art secret 7 - painting pussywillows
These photos are a wonderful example of the elegance of the branches...

study how they curve and dance through the air and

look at all the different colors in the stems, buds and flowers.

Do you want to sketch out your drawing or just start painting? I used burnt sienna, sap green, dioxine violet and burnt umber in my stems and paint wet on dry.

Either way start with the branches and get your light and dark areas painted in.

Now you are ready to add the flowers. I always suggest that you add the jackets to the branch first and then paint in the flowers. And here is the Art Secret! Before you paint, wet the area where you want to add a flower starting near the stem and then add a drop of-you guessed it-Rose Dore and let the water do the work for you. While it's wet add your choice of another color to the flower and let the water pull the color over the rose dore and mix. The next Art Secret for the flower is to make sure that the color does not go to the edge, that way you create a light and fluffy look around the flower. Now that you know, go have fun.
April 6, 2011
art secret 6 - Raoul Dufy
Raoul Dufy (1877-1953) was a French Fauvist painter who explored joy and optimism in his very colorful work.
For more about him click here... Raoul Dufy
For more about him click here... Raoul Dufy
Below is a Raoul Dufy inspired project we did while
working from an unusual orchid:
working from an unusual orchid:
This orchid displays a very rare blue color.


Step One: first we did a very loose sketch using dark, watered down acrylic.


Step two: After the acrylic was dry we added very loose, watery color with watercolor. You can add acrylic, too.
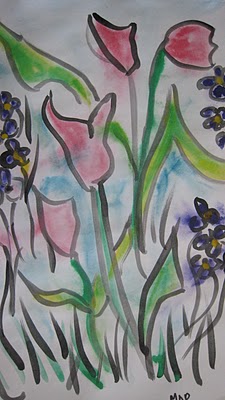
These are two paintings done in this style.
Doing studies in this manner is GREAT for getting the creative juices flowing. It's fun and fast.

December 14, 2010
art secret 5 - easy pine branches with watercolor

If you layer up three different shade of green starting with the lightest value...

you will end up with a very nice feathery, full pine branch. * Art secret...holding your brush perpendicular to the paper, use your wrist to flick the very tip of your brush to create the pine needles. Try it, it's fun.

Add a pine cone and some berries or...

if you want more atmosphere...
1. Start off with a background of a light blue wash and then add your branches and pine needles and maybe some snow. Personalize it the way that you want to.
Subscribe to:
Posts (Atom)